This write-up is offered by AW user "quattro4life"
Supplies used: High-temp engine enamel (flat black, available at any autoparts store). Assorted brushes. Low adhesion painters tape. 200, 400, and 600 grit sandpaper. Needle nose pliers. Copious quantities of patience and elbow grease.
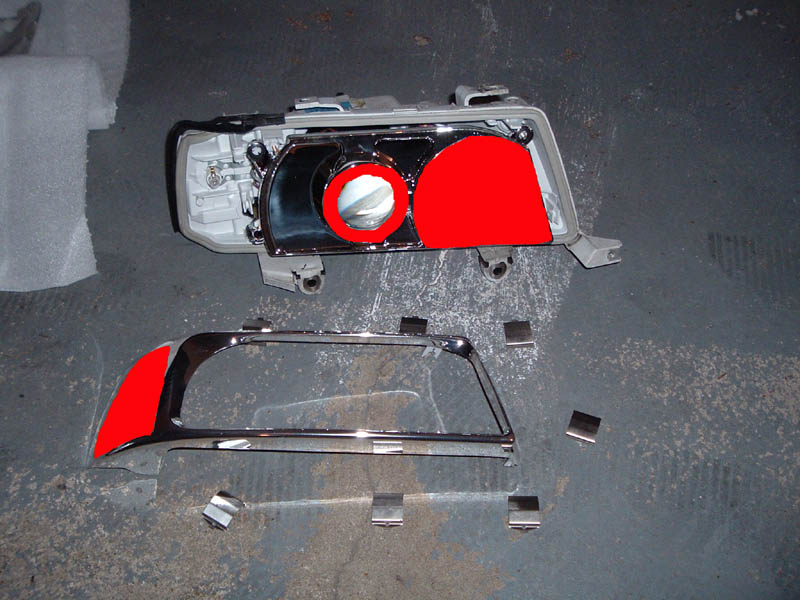
Once the headlights are removed from the car, remove the glass by taking off the ~8 metal clips holding it on. Grab some needle nose pliers, grab on to the side of the clip not on the glass, and pry up and away. Repeat x8 or so. Remove the glass, set aside (I kept mine covered to keep dirt/etc. out of there). Then remove the outer reflector by gently prying on it at all 4 corners. The plastic is a bit flimsy, so dont be too rough with it. Then choose which areas of the light you will paint. Lots of people paint different areas of the light, some have even painted the high-beam reflectors. I will leave that up to you, so feel free to adapt this guide to however you choose to paint yours, as I will describe everything exactly as I did it. A pic of everything apart, showing the areas I painted, and did not paint (areas in red I did not paint):
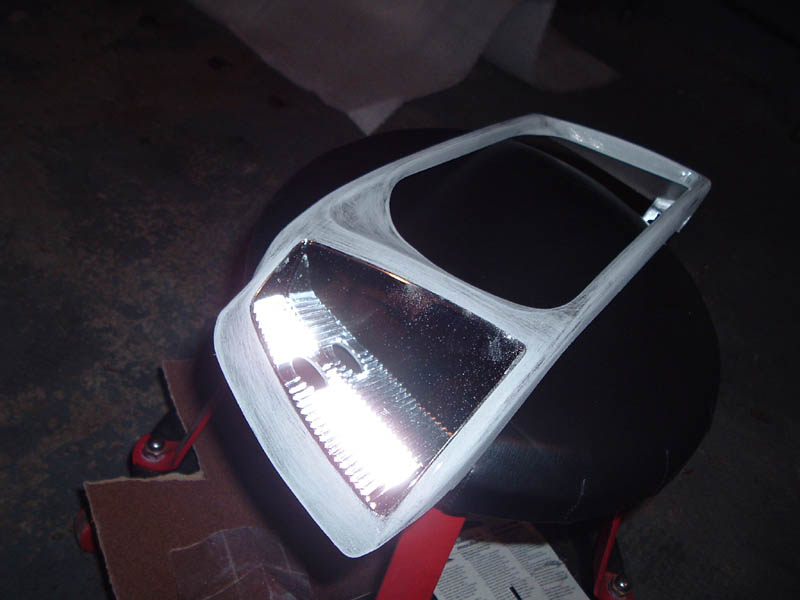
Now comes the fun part -- sanding. A few people have asked me about this, and as far as I know, if you dont sand the 'chrome' plating off, the paint will not adhere. I did not try to paint without sanding, so I cant say I speak from experience, but I had a hard enough time getting the paint to adhere properly even AFTER sanding, so I cant imagine it will stick with that slippery coating still on. I started with a medium 200 grit paper, and sanded off all areas I wanted to paint. Once all (or a sufficient amount) of the coating was sanded off with the 200 grit, I went over it quickly with 400, then 600 grit, to smooth everything out. I started with the outer reflector, and sanded the main part of the headlight while the paint was drying on the outer reflector. A pic of the sanded outer reflector:
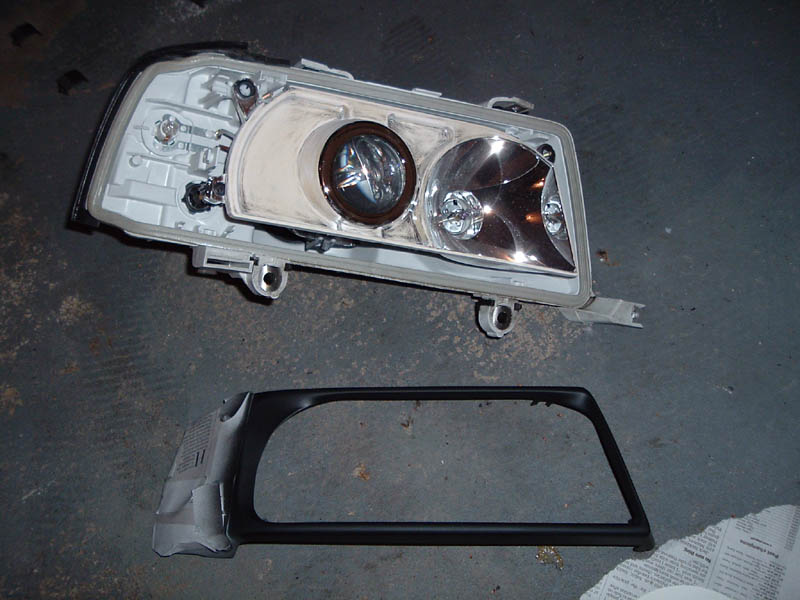
Once the outer reflector was sanded, I masked off the pocket for the driving light, and sprayed the outer reflector. I didn’t worry about taping off the exact area I didn’t want painted, and I after spraying I touched up everything with a brush. When masking, be SURE not to let the tape touch any surface that you want unpainted, as the chrome coating will come off with the tape (I used the lowest adhesion tape available, and it still peeled off in the areas that I tested). A pic of the masked reflector, painted, alongside the sanded main reflector:
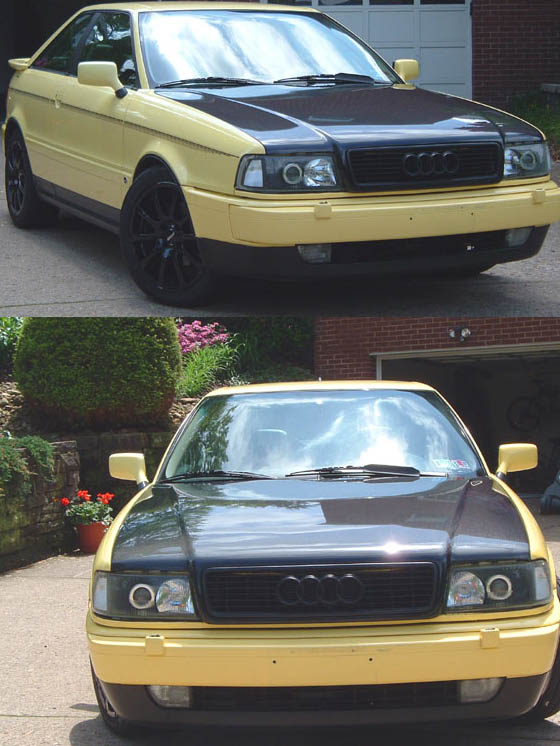
Once the outer reflector is dry, remove the masking, and finish painting with a brush. I used a 1” foam brush, and sprayed the paint directly onto the brush. The paint dries relatively fast on the brush, and makes it very difficult to paint with a hardening brush, so have 3 or so brushes handy, and clean them while you are waiting for paint to dry. I also used a very small brush for detailed areas. Continue painting the main reflector with the brush. Have a soft towel handy in case you get paint on a surface you didn’t wish to paint, so you can wipe it off immediately. Be patient, it will take a few coats to get decent coverage, and always let the paint dry suitably before moving on to the next coat. Hold the glass lens over the headlight to see how it will look (some areas of the light are easier seen through the glass than others, so pay special attention to detail in the areas where the glass is 100% clear). Satisfied? Reassemble the light, and move on to the other one. A ‘before and after’ pic:
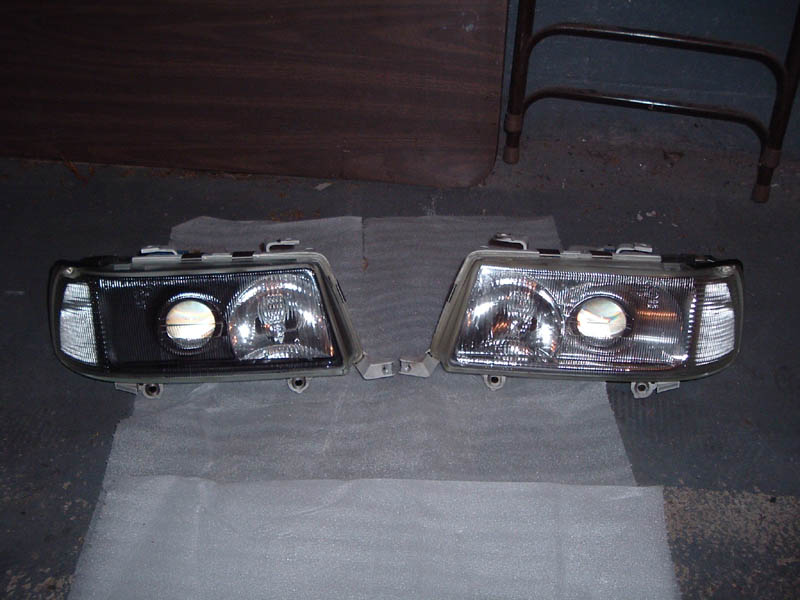
The final result: